Window sealing guide
Published 2025.12.08
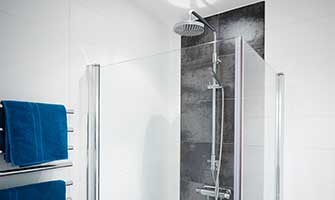
Why sealing windows matters
Sealing windows is an essential part of home maintenance and serves several important purposes. When done correctly, it creates a tight seal between the window frame and the wall opening, helping to prevent water from seeping in. Moisture intrusion can lead to serious damage to both the window frame and the building structure, including rot and mould, which can be costly to fix and harmful to your indoor climate.
Window sealing also plays a major role in your home's energy efficiency. A tight seal helps keep warmth inside during winter and heat out in summer, potentially lowering your energy bills. Plus, it makes your home more comfortable by reducing draughts and blocking out noise from outside

Finally, well-maintained sealing also improves the overall look of your windows, giving them a neat and finished appearance. It complements both the window frames and the overall look of your home. It’s always a good idea to regularly inspect and maintain the sealant around your windows to protect your property and ensure a healthy, comfortable indoor environment.
When should I replace my window sealant?
If you've just moved into a new home or had new windows installed, the sealing has likely been professionally done as part of the installation process. This ensures your windows are properly sealed from the beginning.
But sealing windows isn’t a one-time job. Elastic sealant and compressed sealing tape typically last around five years, so it’s worth checking whether it’s time for a replacement once that period has passed.
Over time, sealant naturally wears down, leading to cracks or shrinkage. This reduces its ability to protect your home from the elements. If you spot these signs, it’s best to replace the sealant – even if it hasn’t been five years yet.
Look out for signs that your windows might need resealing. Draughts, moisture around the frames, or increased noise from outside can all indicate that your current sealing is no longer doing its job.
In some cases, especially with older or damaged windows, it might be more cost-effective to replace the entire window rather than just the sealant. And if you’re not comfortable doing the work yourself, there’s no shame in getting help from a professional to ensure the job’s done right.
Interior and exterior window sealing
Understanding the difference between interior and exterior sealant is key to protecting your windows and doors from the elements. Interior sealing ensures an airtight barrier that helps retain heat and prevents condensation, which can damage the window frames. For the inside, you’ll need a diffusion-tight sealant to stop moisture from getting behind the frame.
Exterior sealing, on the other hand, protects against rain and moisture from the outside. That’s why the outer seal needs to be diffusion-open, allowing any trapped moisture behind the seal to escape – which helps prevent mould and rot. It’s essential to seal both the inside and outside properly using the right materials for each.
Which type of sealant should I use?
When sealing windows, it’s important to understand the different types of sealant and their specific benefits. The most commonly used options are:
- Mortar sealant
- Sealing tape
- Sealant compound
Mortar sealant
Mortar sealing has long been a traditional method for windows and doors, especially valued for preserving the aesthetic and structural integrity of older buildings. Lime-based mortar, in particular, is known for its breathable properties and flexibility. So if you're renovating or replacing sealant in an older home, mortar is a great option to consider.
While it’s certainly possible for DIYers to work with mortar sealant, it does require patience, proper preparation, and a good understanding of the material to get the best results.
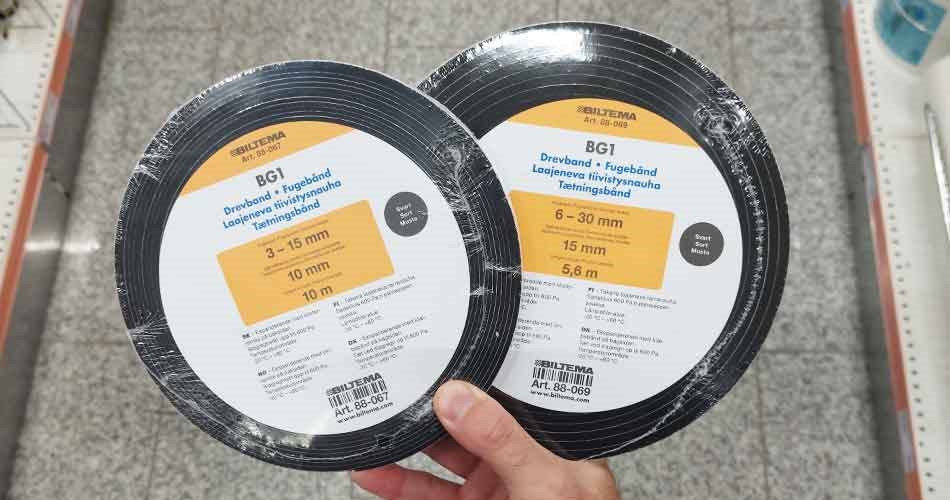
Sealing tape
Sealing tape is a modern and convenient option for windows and doors, most commonly used for exterior sealing. It’s diffusion-open, which allows moisture to escape while keeping rain out. Although sealing tape is an easy solution to work with, it’s also one of the more expensive options.
Keep in mind that sealing tape is pre-compressed and has a self-adhesive side, which should be mounted on the window or door frame – not on the masonry. The tape expands shortly after application, so make sure not to take long breaks once you’ve started the job.
Sealant compound
Sealant compound can be made from various materials such as silicone, polyurethane, or acrylic. It’s highly flexible and ideal for filling gaps and joints where some elasticity is needed. Elastic sealant is especially useful around windows, doors, and other areas where movement or vibrations may occur. You’ll typically use a sealant gun to apply it precisely where needed.
Choosing the right type of sealant depends on your specific project – including the location, exposure to weather and moisture, and visual preferences. By understanding the benefits of each option, you can make the best choice for your home.
You should also check with the window manufacturer what sealant they recommend you use for the window in their installation manual.
Don’t forget insulation and backing rod
Insulation and backing rod are both key components in the sealing process and shouldn’t be skipped. Insulation helps maintain the building’s thermal performance by reducing heat loss and preventing condensation, which can damage both the seal and surrounding materials.
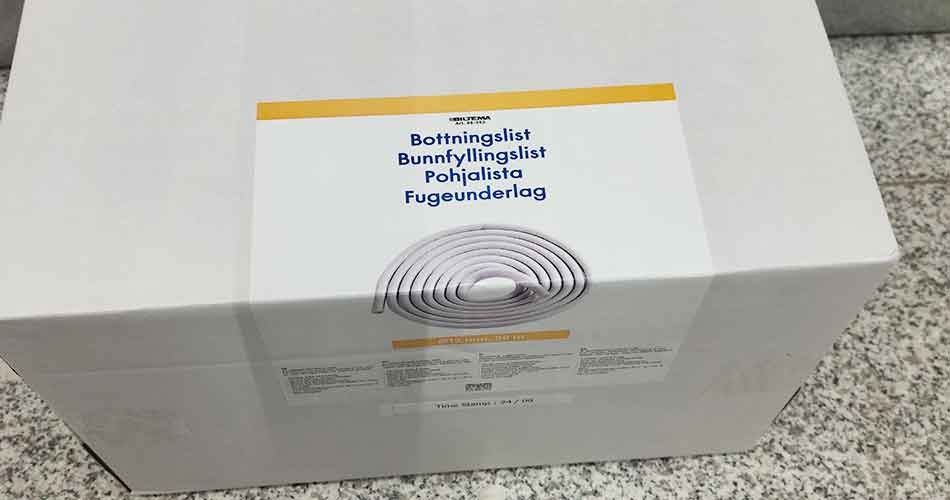
Backing rod, often made from polyethylene foam, is used to create a consistent depth for the sealant. It also prevents the sealant from sticking to the back of the joint, allowing for proper movement and increasing the lifespan of the seal. This is especially important for elastic joints, where movement between building parts needs to be absorbed.
When used correctly, insulation and backing rod not only improve the seal’s performance and durability. They also support a healthier indoor environment and help lower energy costs by keeping windows and doors well-insulated and airtight.
Sealing windows: Step-by-step guide
Getting ready to seal your windows but not sure where to begin? Our step-by-step guide walks you through each part of the process to help you get it right.
- Remove the old sealant: Once you've identified which areas need resealing, start by removing the old sealant. Use a scraper or utility knife to carefully cut away the existing sealant. Make sure to remove all residue, including any old backing rod and insulation. Take care not to damage the window or frame. Mortar sealant can be removed with a hammer or chisel, while tape and compound can be loosened with a basic craft knife.
- Clean the surfaces: Make sure the surfaces are clean, dry, and free from dust and debris before applying the new sealant. A vacuum cleaner can be helpful to remove any loose material.
- Insulate the cavity: The cavity can be insulated using materials like glass wool or sealing felt (which is simply pre-cut glass wool). Avoid packing the insulation too tightly – air circulation is still important.
- Insert new backing rod: Place a round backing rod (also called filler rod or joint backer) into the joint. This ensures the correct amount and shape of sealant is applied. As a rule of thumb, the depth of the seal should be half the width of the gap. Once measured, you'll know how far in the backing rod should sit.
- Prepare your sealant and apply: Whether you're using mortar, sealing tape, or compound, have all materials and tools ready before starting. a. Mortar sealant: Mix the mortar according to the package instructions to get the right consistency. Use a pointing trowel to apply and shape the mortar between the frame and the wall.b. Sealing tape: Measure and cut the required length of tape. Remove the protective backing, then press the tape firmly into place where the window meets the frame or wall. c. Sealant compound: Load the cartridge into a sealant gun and cut the nozzle tip. Apply the compound evenly along the joint, filling the entire gap.
- Smooth the sealant: Use a smoothing tool or your finger dipped in soapy water to smooth the sealant for a clean, even finish. If you use dedicated smoothing fluid (available at most DIY stores), you’ll be able to apply additional sealant later if needed. This won’t be possible if you use soapy water, as the new sealant won’t stick to it.
- Let it dry: Follow the manufacturer’s instructions for drying time before painting or touching the seal.
- Final inspection: Check the seal for any gaps or flaws, and fix them if necessary.
By following these steps, you’ll achieve a strong and durable window seal that helps improve your indoor climate and boosts energy efficiency in your home.